VS Code
To use TypeScript in a Unity project, it is required to use an IDE to write the code in. It is highly recommended to use VS Code because it has Genies tools for autocomplete, debugging, and much more.
Setting Up
Download the latest version of VS Code here: https://code.visualstudio.com/
Extensions
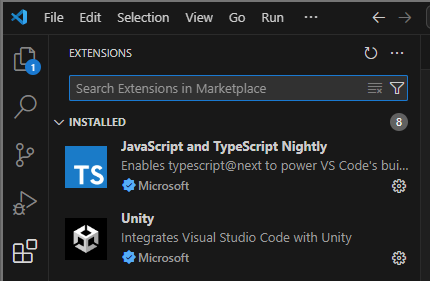
In VS Code, open the left side Extensions tab. Install the Unity and TypeScript extensions for VS Code.
Set the TypeScript Version
VS Code will not recognize all of the TypeScript syntax settings unless you choose the correct version of TypeScript. This setting is per project, so you will need to set this every time you have a new Unity project with the Experience SDK.
Follow these steps:
- In VS Code, open the Unity project folder by selecting File > Open Folder.
- At the top input field, type
> TypeScript: Select TypeScript Version. - Select the second option named Use Workspace Version from the dropdown menu.
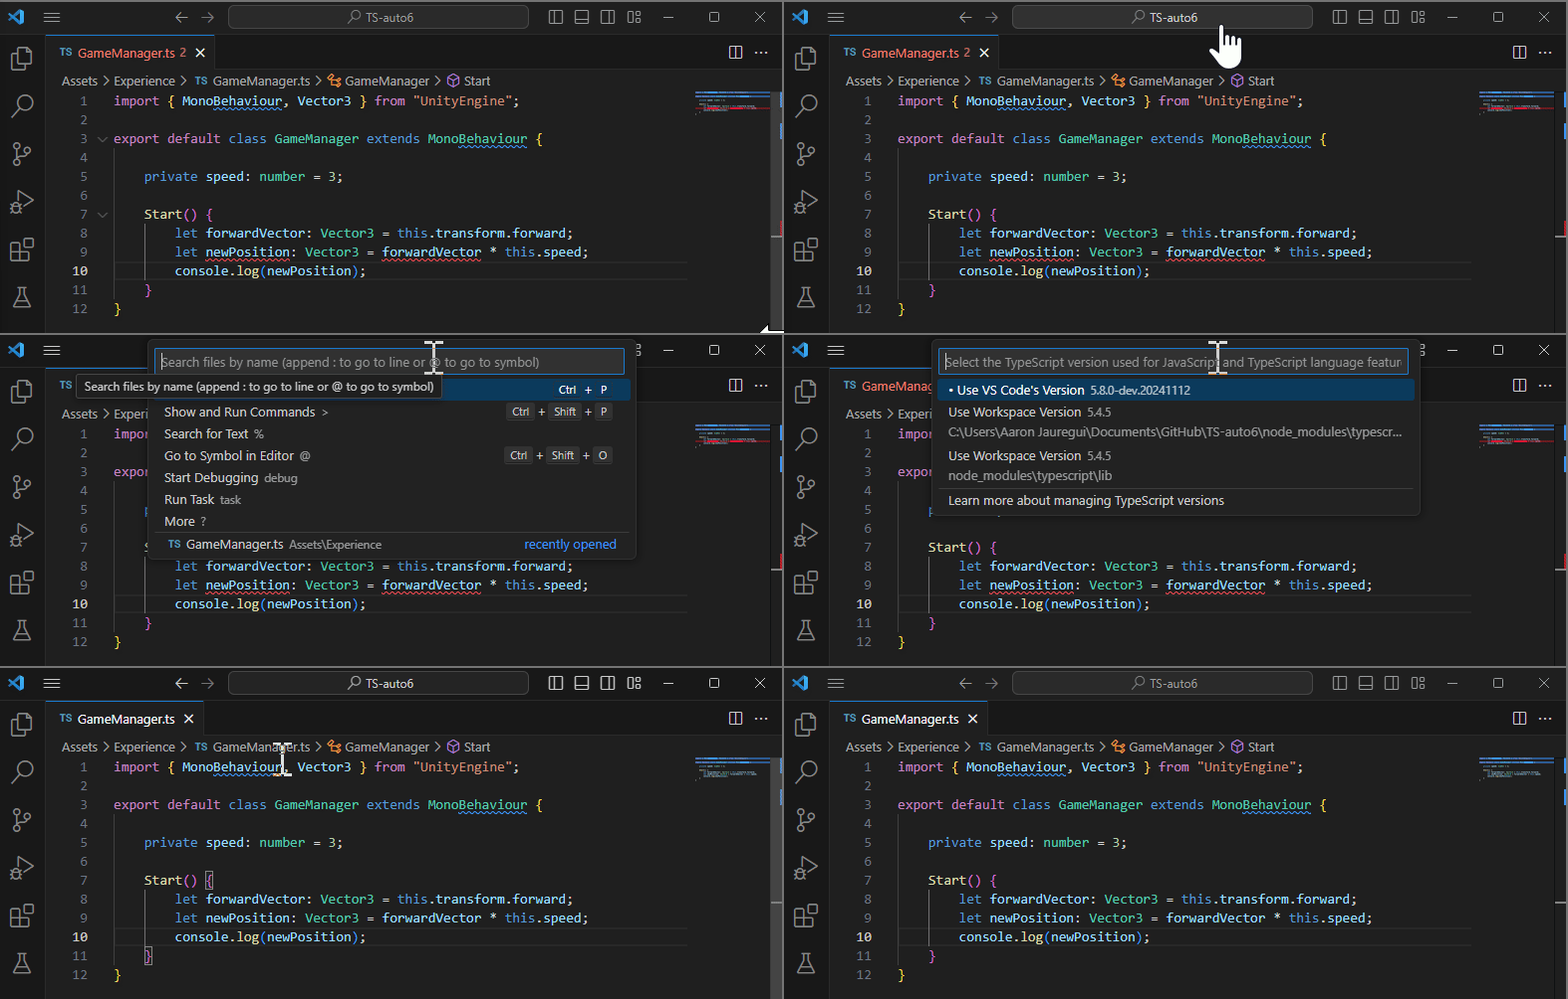
Make sure you add the > symbol as well in the input field.
Set the Default Script Editor
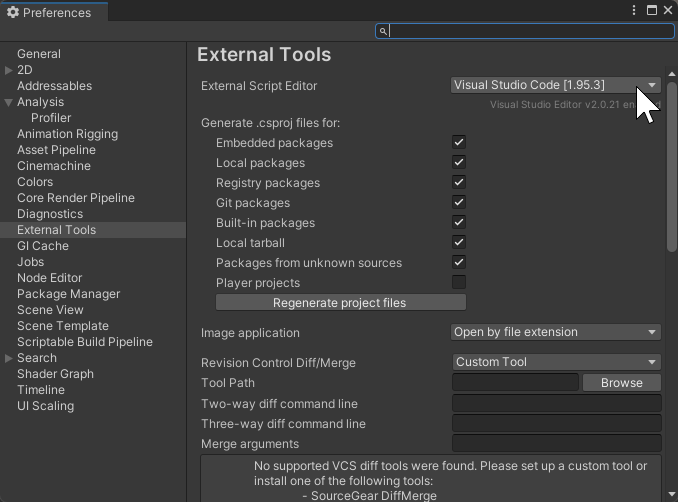
In Unity, select from the top menu dropdown Edit > Preferences. In the External Tools section, make sure Visual Studio Code is selected as the default External Script Editor. This will open up VS Code when double clicking script files in Unity.
Next Steps
Check out the Hello World example to make sure TypeScript is working.
Tips and Tricks
Recompile Script
You can force a script to recompile by selecting the script in the Project window and then in the Inspector window pressing the Recompile button.
Debugging
Check out the Debugging with VS Code page for more information.
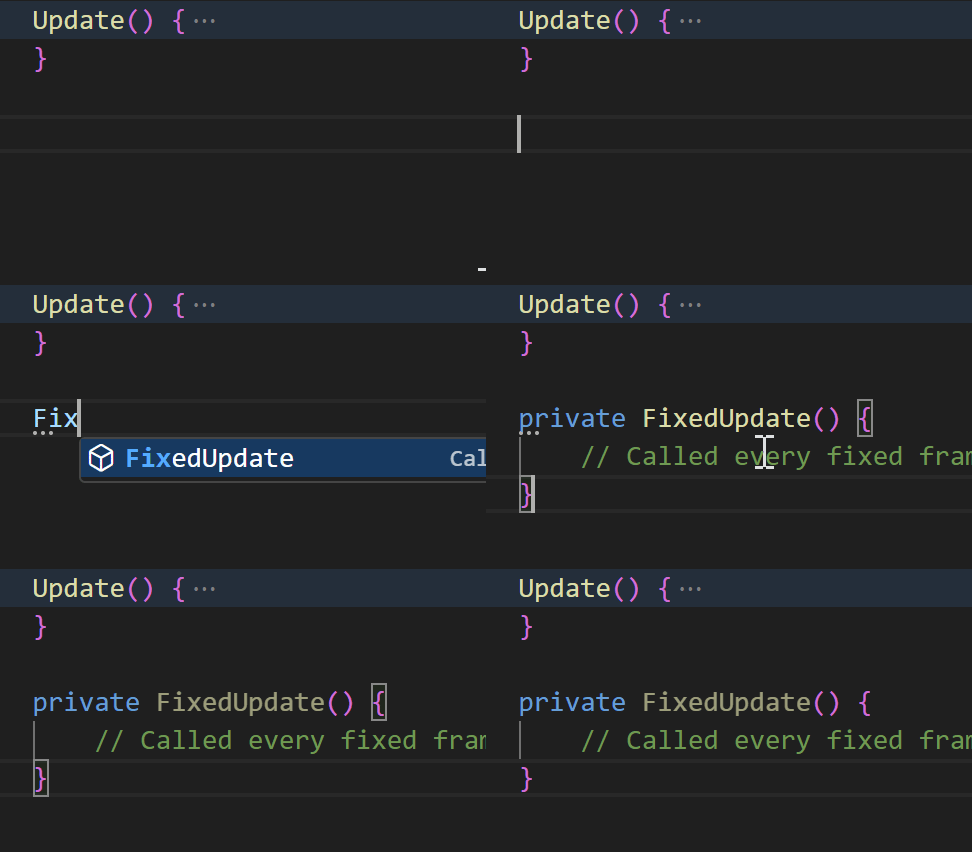
Autocomplete Lifecycle Events
You can autocomplete lifecycle events when you begin typing the names.
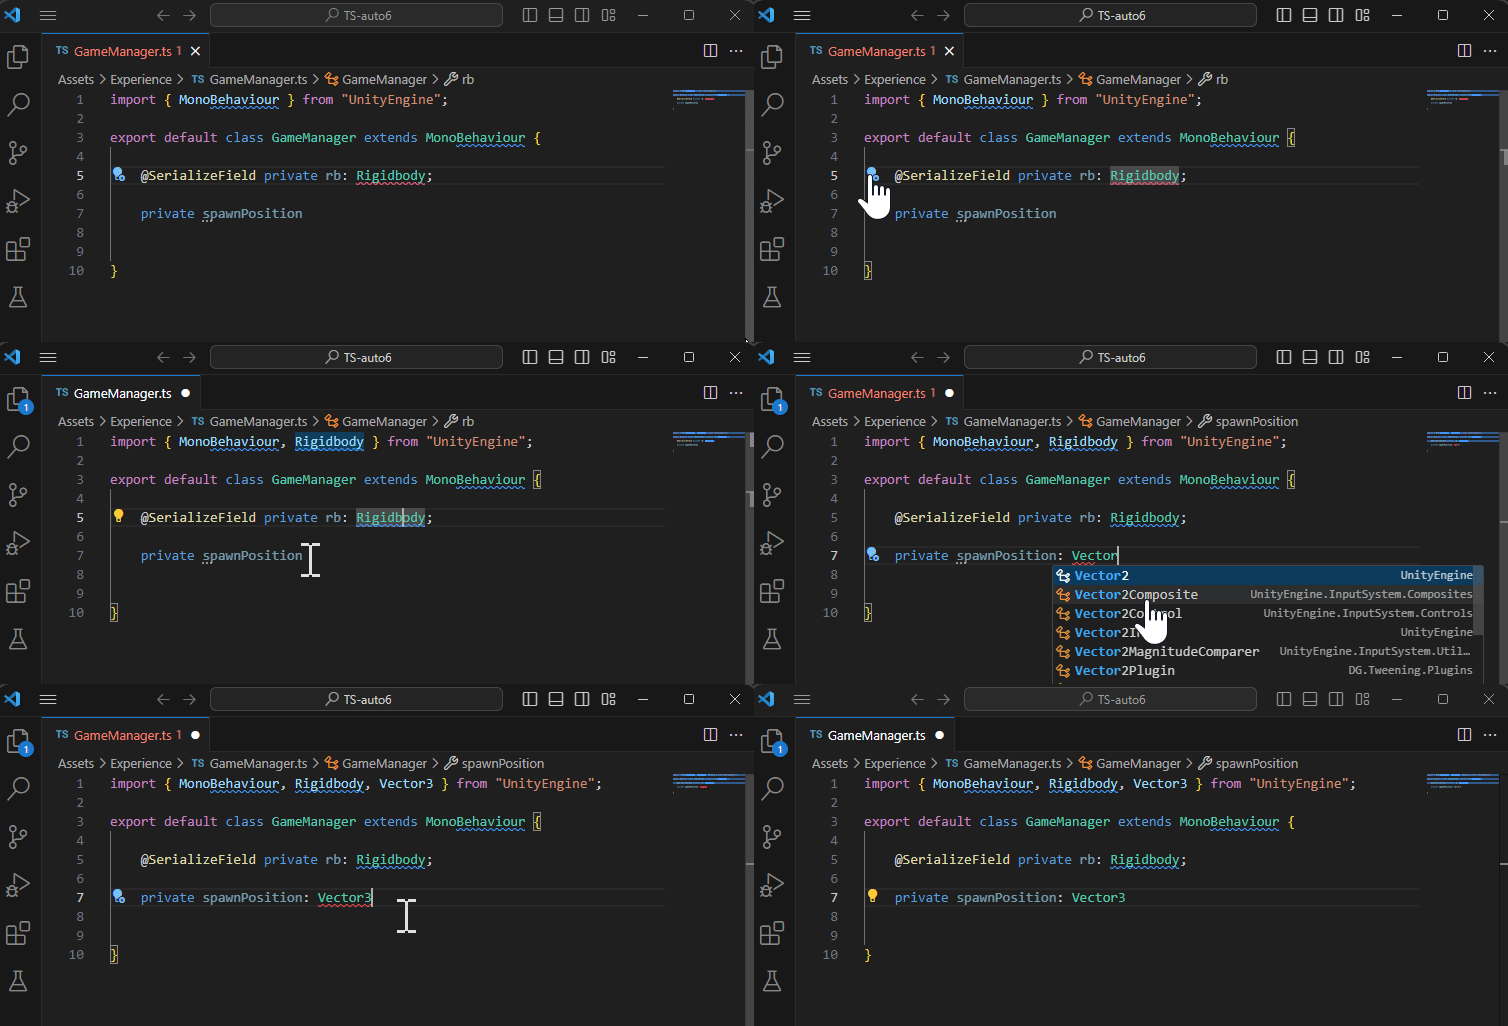
Autocomplete Package Imports
You can autocomplete importing a package when you begin typing the package names. You can also click on the unrecognized package name and then click the blue lightbulb on the left to add the import.
JSDoc Annotations
VS Code has some integrated tools with TypeScript that allows multi-line comments to be really useful to describe code.
Read the JSDoc Reference page in the TypeScript documentation for more information.
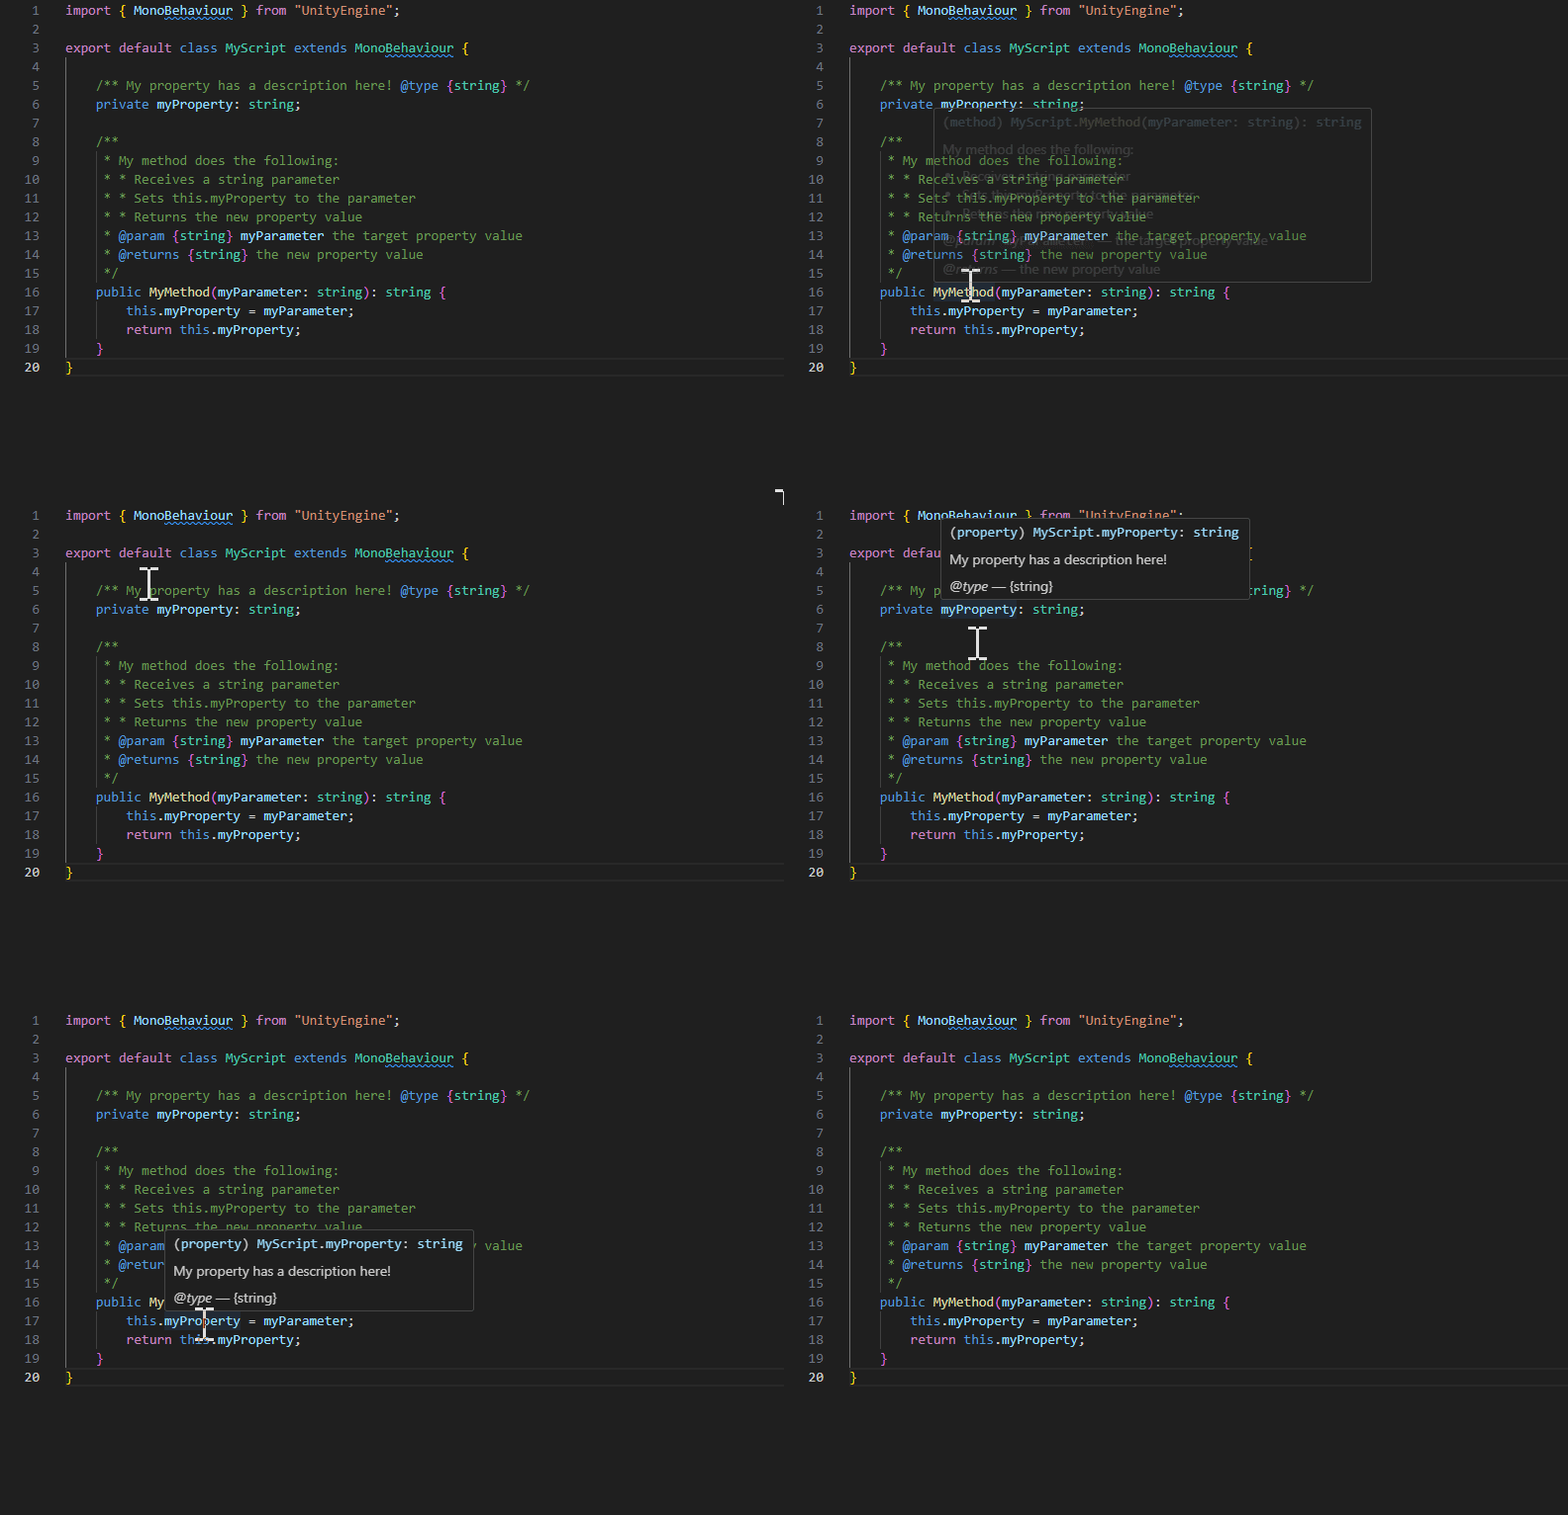
For example, take this script:
import { MonoBehaviour } from "UnityEngine";

export default class MyScript extends MonoBehaviour {

    /** My property has a description here! @type {string} */
    private myProperty: string;

    /**
     * My method does the following:
     * * Receives a string parameter
     * * Sets this.myProperty to the parameter
     * * Returns the new property value
     * @param {string} myParameter the target property value
     * @returns {string} the new property value
     */
    public MyMethod(myParameter: string): string {
        this.myProperty = myParameter;
        return this.myProperty;
    }
}
Hovering over these methods and properties will show the comment's information. This even works when referencing them in other scripts.
