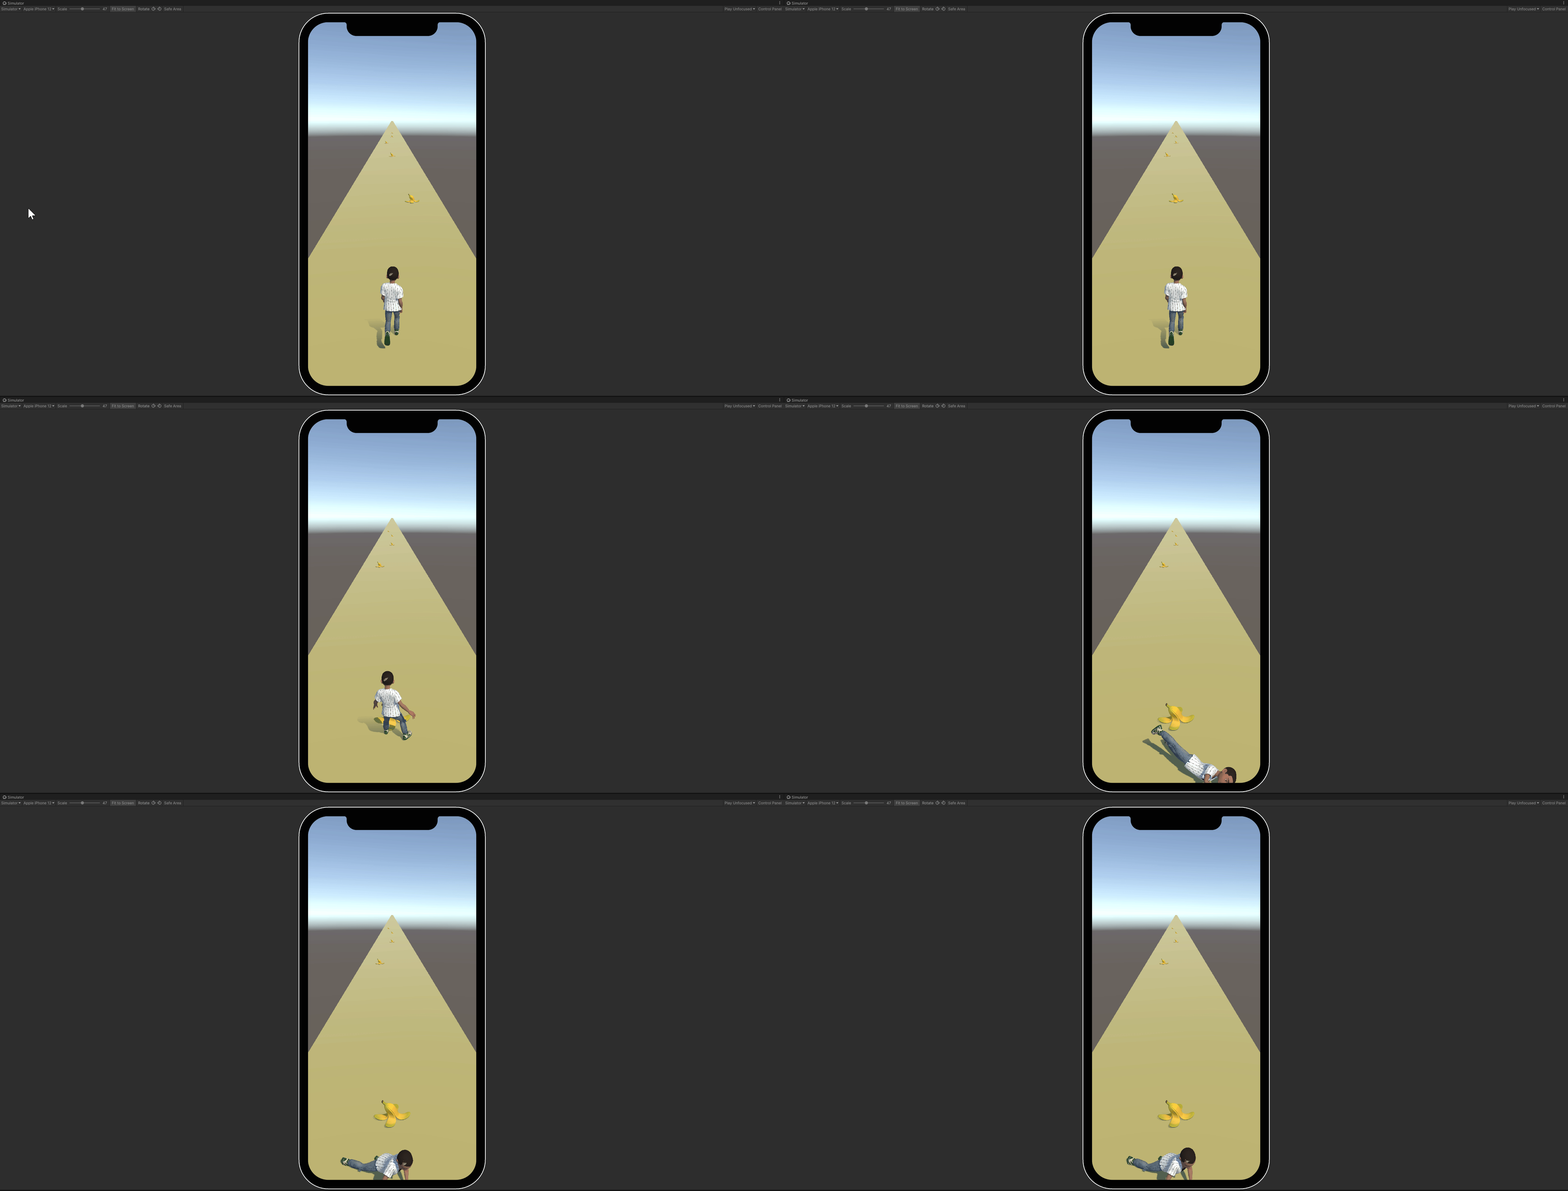
Creating an Enemy Controller
The enemy will be spawned initially in a large pool of objects and activated over time as the game starts.
Create an Enemy Prefab
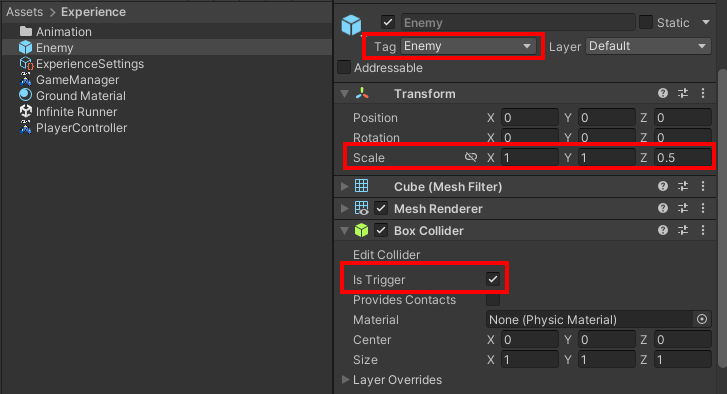
Create a new 3D Cube game object and name it Enemy. With it selected, open the Inspector and set the following properties:
- Create a new Tag property named
Enemyand assign it to the Enemy game object. - Set the Scale properties to be X:
1, Y:1, Z:0.5. - Activate the Box Collider's Is Trigger property.
Then drag the Enemy game object to the Assets > Experience folder in the Project window to create a prefab asset. Delete the Enemy game object from the scene.
Create the Enemy Controller
The Enemy Controller will manage the following:
- Spawn initial pool of deactivated Enemy objects.
- Activate an enemy from the pool over time as the game plays.
- Deactivate any enemies that moved off screen.
Check out the Mobile Performance page for more information on object pooling.
Create a Genies Behaviour Script
In the Project window, right click in the Assets > Experience folder and select GENIES > Create Scripts > Create Genies Behaviour Script. Rename the script to EnemyController.
Add the Code
Double click the EnemyController script to open the file in VS Code.
Replace the code with this:
import { GameObject, MonoBehaviour, Object, Vector3, Random, Time, WaitForSeconds, Mathf, Coroutine } from "UnityEngine";
import GameManager, { GameState } from "./GameManager";

export default class EnemyController extends MonoBehaviour {

    @Header("Enemy Settings")
    @SerializeField private prefab: GameObject;
    @SerializeField private amountToPool: int = 25;
    @SerializeField private enemySpeed: float = 20;
    @SerializeField private enemySpawnDelay: float = 1;

    private poolList: GameObject[] = [];
    private spawnPosition: Vector3 = new Vector3(0, 0.5, 100);

    private gameManager: GameManager;

    private canMove: bool = false;

    /** This coroutine will spawn enemies over time. */
    private coroutine: Coroutine;

    Start() {
        //Get GameManager singleton and add a listener to OnGameStateChange event
        this.gameManager = GameManager.Instance;
        this.gameManager.OnGameStateChange.addListener(this.CheckGameState);
        //Spawn the pool of enemies
        this.SpawnPool();
    }

    Update() {
        //Move enemies if playing
        if(this.canMove) {
            this.MoveEnemies();
        }
    }

    /** Manages the enemy logic when the game state changes. @param newState */
    private CheckGameState(newState: GameState) {
        switch(newState) {
            case GameState.GAME_PLAY:
                this.OnGamePlay();
                break;
        }
    }

    /** This will manage the enemies once the game starts. */
    private OnGamePlay() {
        this.ResetEnemies();
        this.coroutine = this.StartCoroutine(this.SpawnEnemies());
        this.canMove = true;
    }

    /** Resets all the enemies back to deactivated. */
    private ResetEnemies() {
        this.poolList.forEach ((enemy) => {
            enemy.SetActive(false);
        });
    }

    /** Moves all activated enemies. It also deactivates the offscreen ones. */
    private MoveEnemies() {
        this.poolList.forEach ((enemy) => {
            if(enemy.activeInHierarchy) {
                if (enemy.transform.position.z < -10) {
                    enemy.SetActive(false);
                }else{
                    enemy.transform.position = new Vector3(
                        enemy.transform.position.x,
                        enemy.transform.position.y,
                        enemy.transform.position.z - this.enemySpeed * Time.deltaTime);
                }
            }
        });
    }

    /** Spawns the initial pool of GameObjects and deactivates them. */
    private SpawnPool() {
        for(let i = 0; i < this.amountToPool; i++) {
            let temp = Object.Instantiate(this.prefab, this.transform) as GameObject;
            temp.SetActive(false);
            this.poolList[i] = temp;
        }
    }

    /** Coroutine that spawns a new enemy from the pool. */
    private *SpawnEnemies() {
        while(true) {
            yield null;
            //Get a deactivated enemy from the pool
            let enemy = this.GetPooledObject();
            if (enemy) {
                //Spawn in a random lane and activate
                let lane = Mathf.Floor(Random.Range(-1, 2));
                enemy.transform.position = new Vector3(
                    lane,
                    this.spawnPosition.y,
                    this.spawnPosition.z);
                enemy.SetActive(true);
            }
            yield new WaitForSeconds(this.enemySpawnDelay);
        }
    }

    /** @returns a deactivated GameObject from the pool. */
    private GetPooledObject() : GameObject {
        let result = null;

        for(let i = 0; i < this.amountToPool; i++) {
            let temp = this.poolList[i];
            if(!temp.activeInHierarchy) {
                result = temp;
                break;
            }
        }

        return result;
    }
}
A coroutine is a useful because it can perform repetitive tasks spaced over specific amounts of time. In TypeScript, a coroutine needs to be assigned to a generator method.
//Generator methods are written with * at the beginning
*MyCoroutine() {
    console.log("Coroutine starting!");
    yield new WaitForSeconds(1);
    console.log("Coroutine after 1 second!");
}
//Start the coroutine
this.StartCoroutine(this.MyCoroutine());
Check out the TypeScript API page for more information.
Create an Empty Game Object
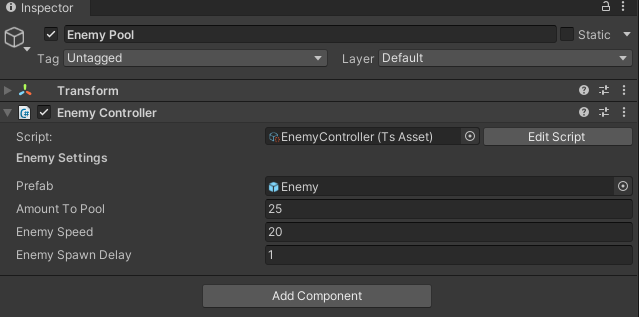
Create an empty Game Object in the Hierarchy and rename it Enemy Pool. Drag the EnemyController script on top of the new empty object to add it as a component.
Select the Enemy Pool game object and open the Inspector window. Add the Enemy prefab to the Prefab property.
Test the Project
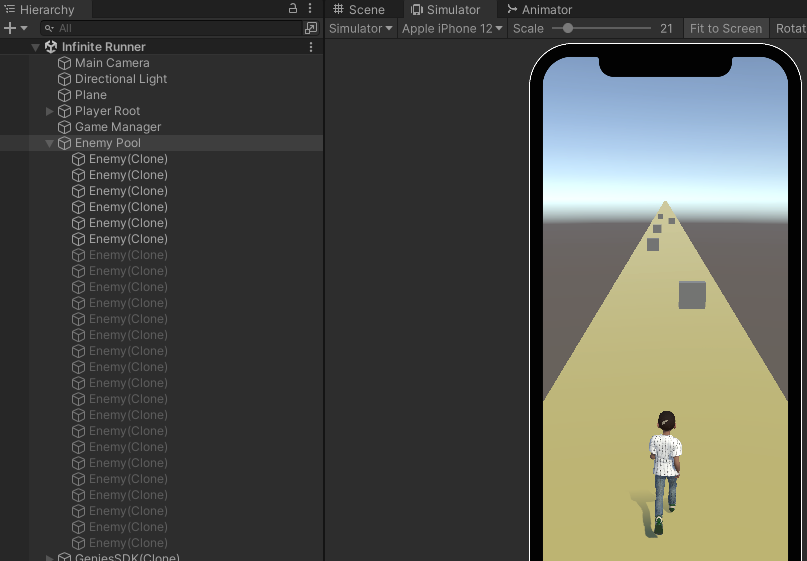
Press the Play button. The Enemy Pool should spawn an initial pool of object as children. Once the game starts, it should start activating the moving enemies and deactivate any that move off screen.
Add a Banana Model
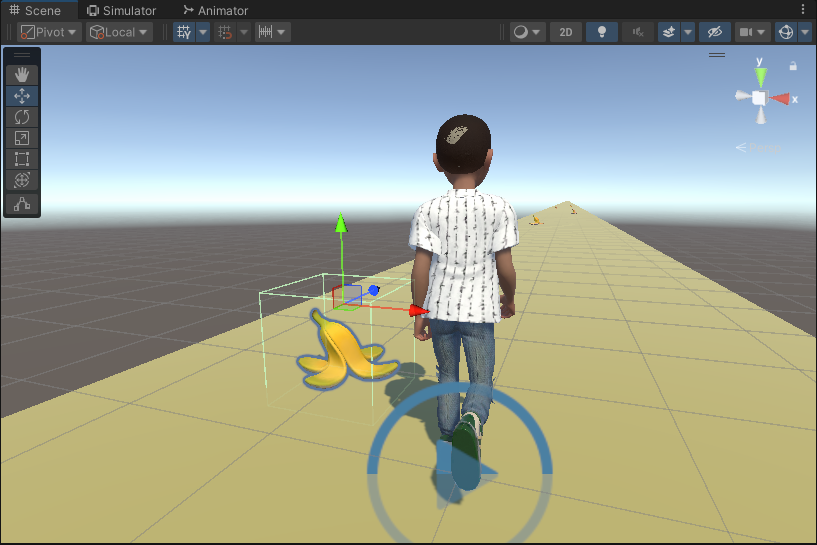
The enemy as a cube is not very interesting so the next step will be to replace it with a banana model.
Import the Model
Download the custom Unity package containing the banana model assets: BananaModel.unitypackage
Once downloaded, open Unity and right click in the Project window. Select the Import Package > Custom Package... option and then select the downloaded package. Click the Import All button.
This custom package will be imported into the Assets > Experience > Model folder. It will contain all the necessary assets and a Banana Peel prefab with it working all together.
Add Banana to the Enemy
In the Project window, double click the Enemy prefab to open the prefab preview in the Scene window. Drag and drop the Banana Peel prefab to be a child of the Enemy root object.
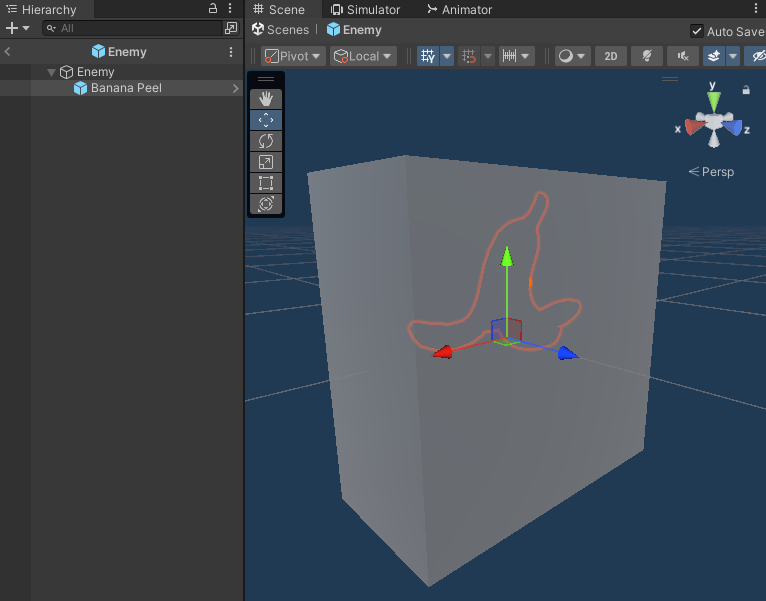
Adjust the Enemy Components
Remove the Cube (Mesh Filter) and Mesh Renderer components from the root Enemy prefab object to remove the cube mesh. Then set the following properties:
- Set the Scale property to X:
1, Y:1, Z:1. - Set the Box Collider Center property to X:
0, Y:-0.25, Z:0. - Set the Box Collider Size property to X:
0.75, Y:0.75, Z:0.75.
Then set the Banana Peel child object position to X: 0, Y: -0.5, Z: 0 so it will sit on the ground when spawned.
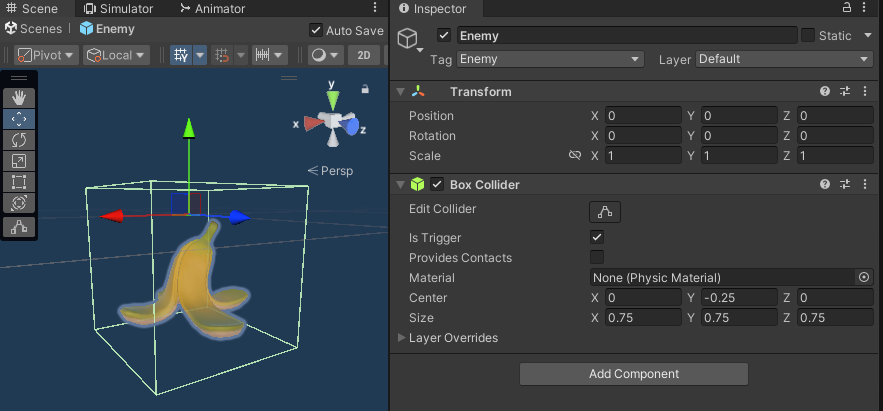
Add the MegaStylizer Shader
The next step will be using our MegaStylizer shader to give the banana model a better look.
The MegaStylizer shader is a unique Genies tool that allows your scene to have consistent, high-quality art theme.
Check out the MegaStylizer page for more information.
Lock the Banana Material
Select the bananaMaterial asset in the Assets > Experience > Model folder and open the Inspector. Click the Lock button at the top right so it will not change the Inspector based on selection.
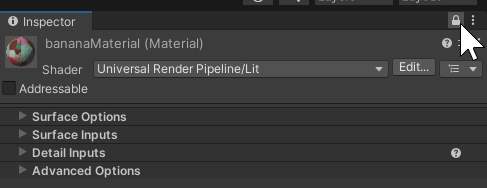
Drag in the MegaStylizer
Find the MegaStylizer_5.1_Lite shader asset in the Packages > Genies Shaders > Runtime > Shaders > MegaStylizer folder. Drag and drop it into the Inspector window to add it to the banana material.
Test the MegaStylizer
With the Enemy prefab preview open, test the values of the MegaStylizer properties for the banana material.
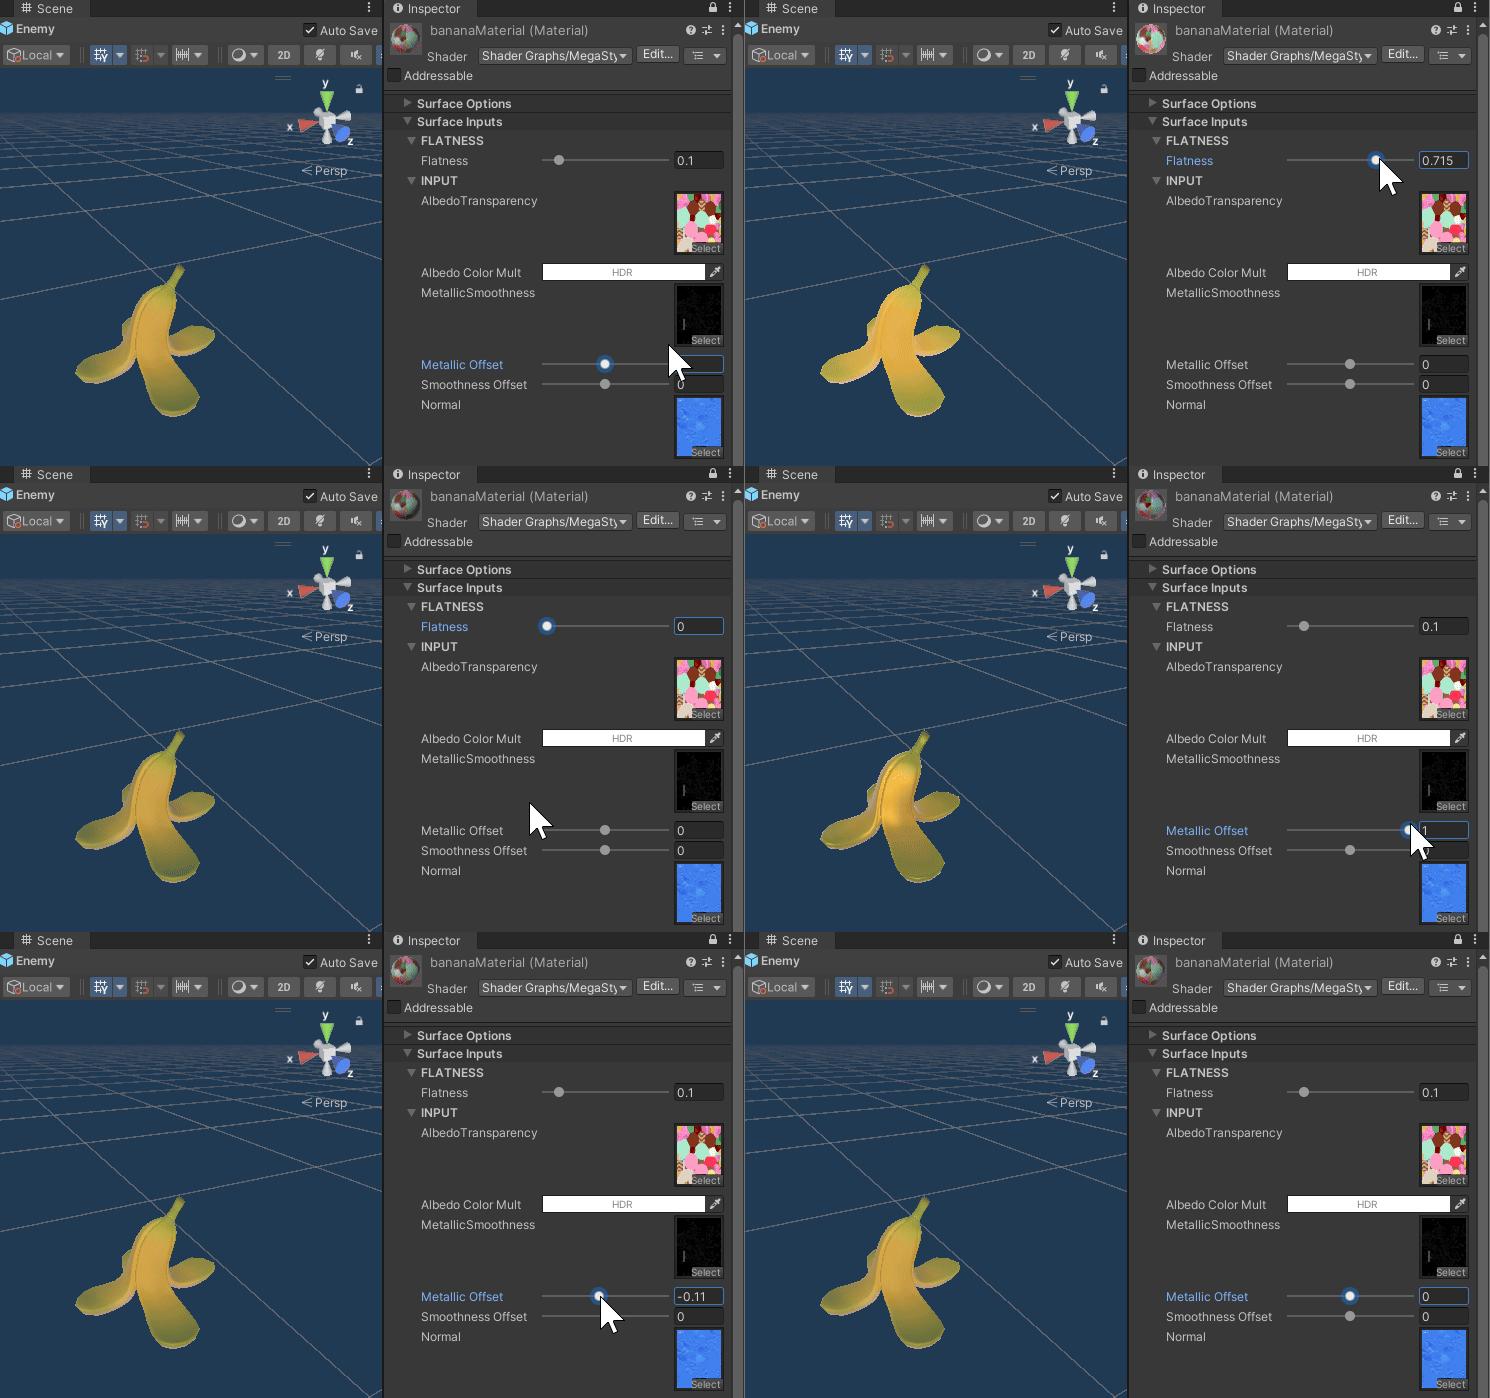
Test the Project
Press the Play button. The enemies should now be replaced by bananas.
Add Collision Logic
The next step will setup the collision logic for the player and enemies. Both will stop moving and the player will trigger the slipping animation.
Add Player Logic
Double click the PlayerController script to open VS Code.
Add the highlighted code:
OnTriggerEnter(coll: Collider) {
    //End game if colliding with enemy
    if (coll.gameObject.tag == "Enemy") {
        this.gameManager.ChangeGameState(GameState.GAME_OVER);
    }
}

/** Manages the player logic when the game state changes. @param newState */
private CheckGameState(newState: GameState) {
    switch(newState) {
        case GameState.GAME_PLAY:
            this.OnGamePlay();
            break;
        case GameState.GAME_OVER:
            this.OnGameOver();
            break;
    }
}

/** This will manage the player once the game ends. */
private OnGameOver() {
    this.canMove = false;
    this.userAvatar.Animator.SetFloat("idle_run_walk", 0);
    this.userAvatar.Animator.SetTrigger("slip");
}
The idle_run_walk float property needs to be set to 0 so it doesn't transition away from the Slipping animation right after it is triggered.
Add Enemy Logic
Double click the EnemyController script to open VS Code.
Add the highlighted code:
/** Manages the enemy logic when the game state changes. @param newState */
private CheckGameState(newState: GameState) {
    switch(newState) {
        case GameState.GAME_PLAY:
            this.OnGamePlay();
            break;
        case GameState.GAME_OVER:
            this.OnGameOver();
            break;
    }
}

/** This will manage the enemies once the game ends. */
private OnGameOver() {
    if(this.coroutine) {
        this.StopCoroutine(this.coroutine);
    }
    this.canMove = false;
}
Test the Project
Press the Play button. The player should slip and fall when it collides with a banana.
